A Beginner's Guide to Wiring Universal Small Trailer Tail Lights
Wiring your universal small trailer tail light correctly is crucial for safety precautions. Proper wiring ensures that your lights function well, keeping you visible on the road. Plus, installing these Brake Turn Reversing Tail Lights is easier than you might think. With a little patience, you can do it yourself!
Key Takeaways
Get important tools like wire strippers, cutters, and electrical tape before you start installing your trailer lights.
Learn the wiring color codes to connect your new lights right and make sure they work well.
Fix common problems like flickering or broken lights by checking ground connections and making sure the wiring is secure.
Tools and Materials for Trailer Lights
Before you dive into wiring your trailer lights, it’s essential to gather your materials and tools. Having everything ready will make the process smoother and more enjoyable.
Essential Tools
You’ll need a few basic tools to get started. Here’s a handy list of what you should have on hand:
Wire Strippers: These help you remove insulation from wires without damaging them.
Wire Cutters: Use these to cut wires to the desired length.
Screwdriver: A standard screwdriver will help you secure the lights.
Electrical Tape: This is crucial for insulating your connections.
Drill (optional): If you need to make new holes for mounting.
Heat Shrink Wraps: These provide extra protection for your connections.
Multimeter (optional): This tool helps you check for continuity and voltage.
Required Materials
Now that you have your tools, let’s talk about the materials you’ll need. Here’s what to gather:
New trailer lights: LED lights are highly recommended for their brightness and efficiency.
Wiring harness or adapter: This connects your lights to the vehicle’s electrical system.
Wire connectors: Butt connectors or crimp connectors will ensure solid connections.
Additional wire: You might need extra wire for longer runs.
Dielectric grease: This helps prevent corrosion on electrical connections.
You can find these materials at local trailer supply stores or online sources like eTrailer.com. With everything gathered, you’re ready to start wiring your trailer lights!
Step-by-Step Guide to Install Trailer Lights
Now that you have your tools and materials ready, let’s dive into the steps to install trailer lights. Follow these simple instructions to get your new LED trailer lights up and running!
Preparing the Trailer
Before you start, make sure your trailer is parked on flat, level ground. Turn off your vehicle's engine and disconnect any power sources. It’s also a good idea to ensure the trailer and lights are cool to the touch. Gather your electrical tape, wire connectors, and tools like wire cutters and strippers. If you need to drill holes for mounting, have your drill handy.
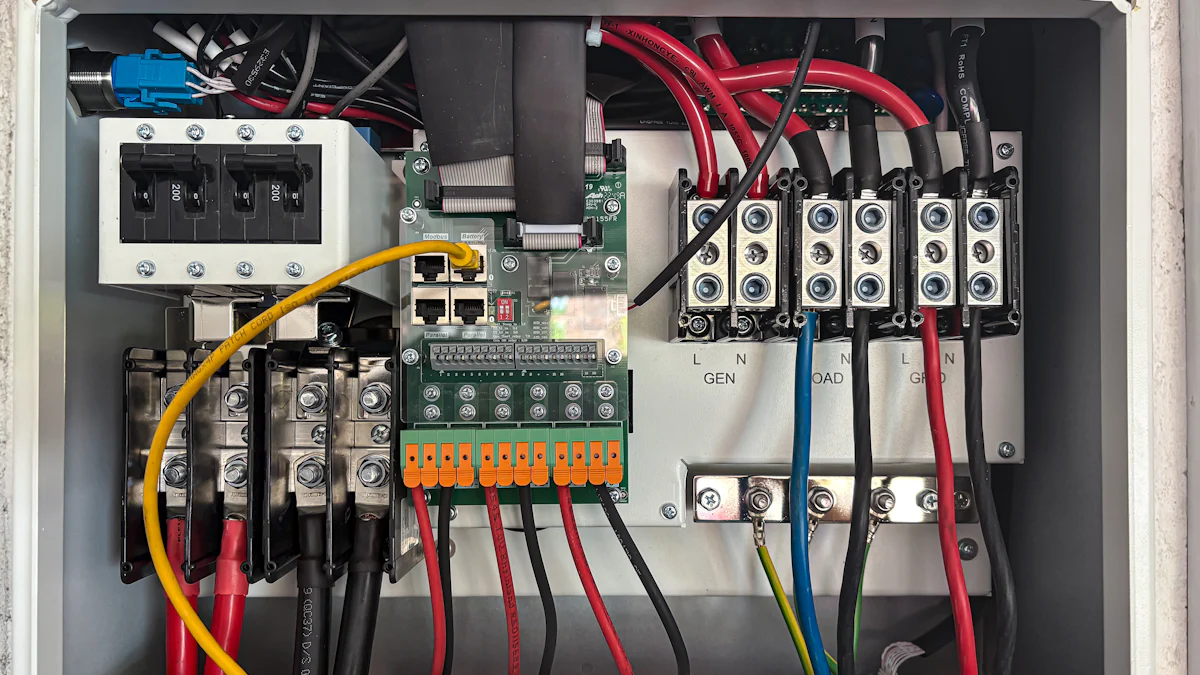
Identifying Wiring Color Codes
Understanding the wiring color codes is crucial for connecting your new lights correctly. Here’s a quick reference table:
Wire Color | Function |
|---|---|
White | Ground wire |
Brown | Taillights and Running Lights |
Yellow | Left Brake Light and Turn Signal |
Green | Right Brake Light and Turn Signal |
Connecting the Wires
Start by removing the old lights from your trailer. Cut and strip the wires connecting to the old lights. Connect the corresponding wires from your trailer to the new LED lights. Use butt connectors or soldering for secure connections. Remember to stagger wire connections to prevent interference. After connecting, protect the connections with electrical tape or heat shrink wraps.
Securing the LED Trailer Lights
Grounding the lights is essential for proper functionality. Connect the white wire to the metal frame of the trailer. If your lights are self-grounding, they’ll ground through the mounting hardware. Next, install the new LED lights using screws, ensuring they are securely fastened. Finally, test the lights to ensure everything works correctly.
By following these steps, you’ll successfully install trailer lights and enhance your safety on the road!
Troubleshooting LED Replacement Trailer Lights
When you install LED replacement trailer lights, you might run into a few common issues. Don’t worry! Here’s how to troubleshoot some of the most frequent problems.
Light Not Working
If your trailer lights aren’t working, start by checking the ground connection. Make sure the white ground wire is securely attached to a clean, bare metal spot on the trailer. If there’s paint or debris, sand it down before reattaching. A weak ground connection often causes issues. Here are some other things to check:
Corrosion
Broken wires
Poor ground connections
One function of the trailer light system doesn’t work
If none of the light functions work, it might be time to inspect the wiring harness or the LED trailer lights themselves.
Flickering Lights
Flickering lights can be frustrating. This issue often arises from incompatibility with your vehicle's CANBUS system. The system detects the lower resistance of LED lighting as a fault. Poor connections or faulty wiring can also lead to flickering. Here’s what to look for:
Loose connectors or wires
Issues with the power supply
Faulty bulbs
Incorrect Wiring
Incorrect wiring can cause a range of problems. Look for these signs:
Loose connectors or wires
Missing fuses or relays on a plug-in harness
Weak or loose ground connections
If you notice any of these issues, double-check your trailer wiring installation. Make sure each wire connects to the correct place on the truck. Taking the time to troubleshoot will help ensure your tail lights work properly and keep you safe on the road!
Wiring your trailer lights correctly is vital for safety. Follow the installation steps carefully to avoid issues. Take your time and double-check all connections. Here are some resources to help you:
Gather your materials, including electrical tape and wire connectors.
Follow the steps to remove old lights and connect new wires.
Ensure safety precautions throughout the process.
With patience and attention, you’ll have your lights working perfectly! 🚦
FAQ
How do I know if my universal small trailer tail light is compatible with my trailer?
Check the specifications of your tail lights and compare them with your trailer's wiring harness. Compatibility ensures proper function and safety.
What should I do if my trailer lights are dim?
Dim lights often indicate a poor ground connection or a weak wiring harness. Inspect the connections and ensure everything is secure and clean.
Can I use LED lights with my existing trailer wiring?
Yes, you can use LED lights with your existing trailer wiring. Just ensure your wiring harness is compatible and check for any necessary resistors.