Comparing Paper Mache Drying Times: Traditional vs. Quick-Dry Methods, and how long does paper mache take to dry

You just shaped your cool paper mache art. Now you must wait. How long does paper mache take to dry? Drying times are very different. Old ways usually take one to several days. Fast-drying ways can make it a few hours or one day. How wet the air is matters. How thick the layers are matters. Your paste recipe also changes it. Knowing how things dry helps you make good crafts.
Key Takeaways
Paper mache drying times change a lot. Traditional methods take 1 to 3 days. Quick-dry methods can finish in a few hours or one day.
Many things affect drying time. These include how wet the air is, how thick your layers are, and the type of paste you use. Warmer, drier air helps projects dry faster.
You can speed up drying. Use fans, dehumidifiers, or even a hairdryer on a low setting. Always apply thin layers of paper mache. Let each layer dry before adding more.
Make sure your paper mache is fully dry. It should feel hard and light. It should also make a hollow sound when you tap it. Wet spots look darker or shiny. Not drying it completely can cause mold or make your project weak.
Traditional Drying Times
Traditional Paper Mache Defined:
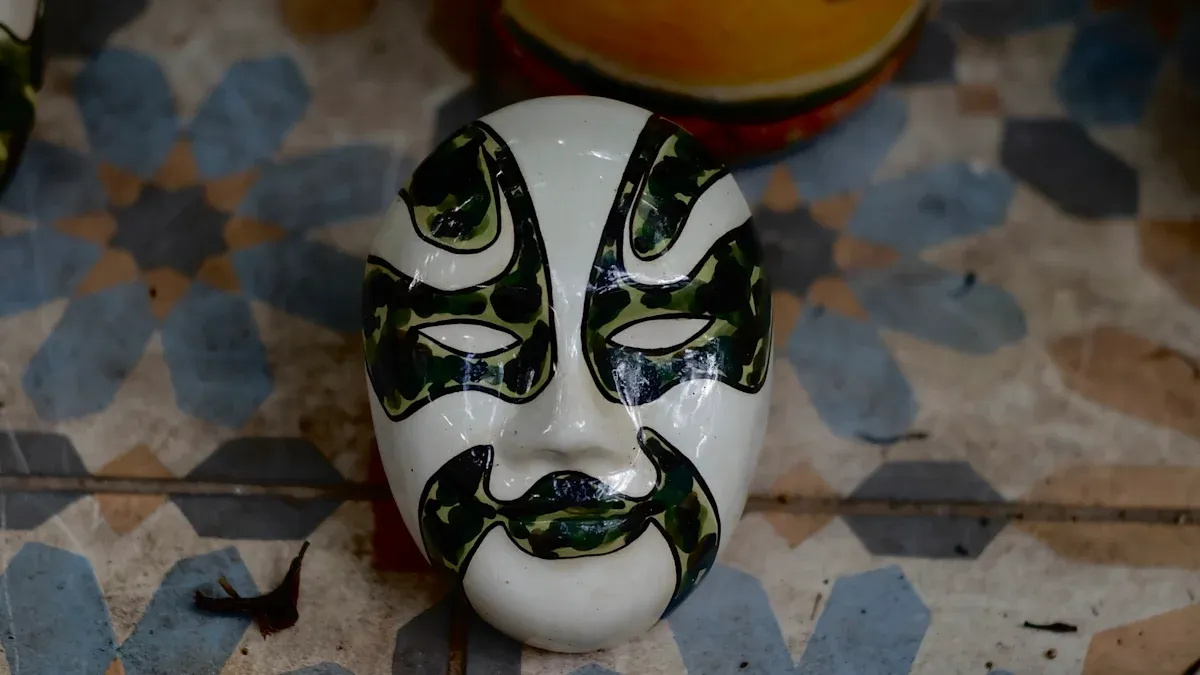
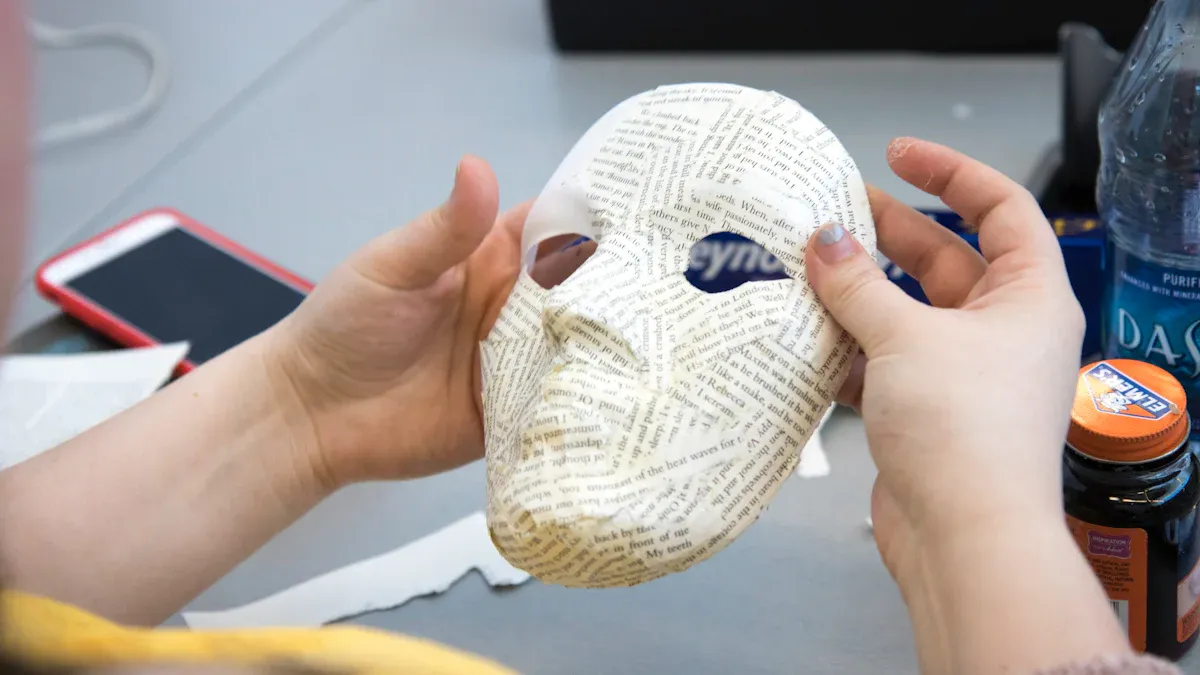
Traditional paper mache uses simple materials. You combine strips of paper, usually newspaper, with a homemade paste. This paste often comes from flour and water. It is a classic way to create sculptures and crafts.
You can make a simple flour and water paste without heat. You need:
1 cup white flour
1 1/2 cups water (warm water helps mix it better)
To prepare it, mix the flour and water in a bowl. Stir and mush it with your hands until it is smooth. An immersion blender can make it even smoother. The paste should look like a thick, creamy soup. Add more flour or water to get the right thickness. Use this paste within a day. The gluten in it will break down, making it less sticky and giving it an odor.
Other traditional pastes use heat. These methods release starch, which helps the paste bind better.
Microwave Method: Mix one part flour with two parts water. Stir to remove lumps. Microwave it for 30-40 seconds, stir, and repeat 2-4 times. Do this until it thickens like a 'thick soup'. Stir well and let it cool.
Stovetop Method: Add about 4 tablespoons of white flour to 2 cups of water in a pan. Heat it, stirring all the time, until it starts to bubble. Turn off the heat. Let it cool and thicken before you use it. You can also add 1 tablespoon of salt to your paste, especially if you live in a humid area. This helps preserve it.
Typical Drying Duration:
When you use traditional paper mache, you must be patient. Your project generally takes 24 to 72 hours to dry completely. Very thick layers or high humidity can make it take even longer. A single, thin layer might dry in as little as 30 minutes. But in cold or humid places, even one layer can take over 24 hours. You must let each layer dry fully before you add the next one. This prevents mold and ensures strength.
Key Drying Factors:
Several things affect how long your paper mache takes to dry. You can control some of these factors.
Humidity: High humidity makes drying much slower. The air already holds a lot of moisture. It cannot take much more from your project. Warmer, drier conditions help things dry faster. If it is a humid day, use a dehumidifier. This helps manage moisture levels. If you live in a cold, rainy place, drying will be slow. Bring your project indoors. Indoor air is usually less humid. A fan can also help.
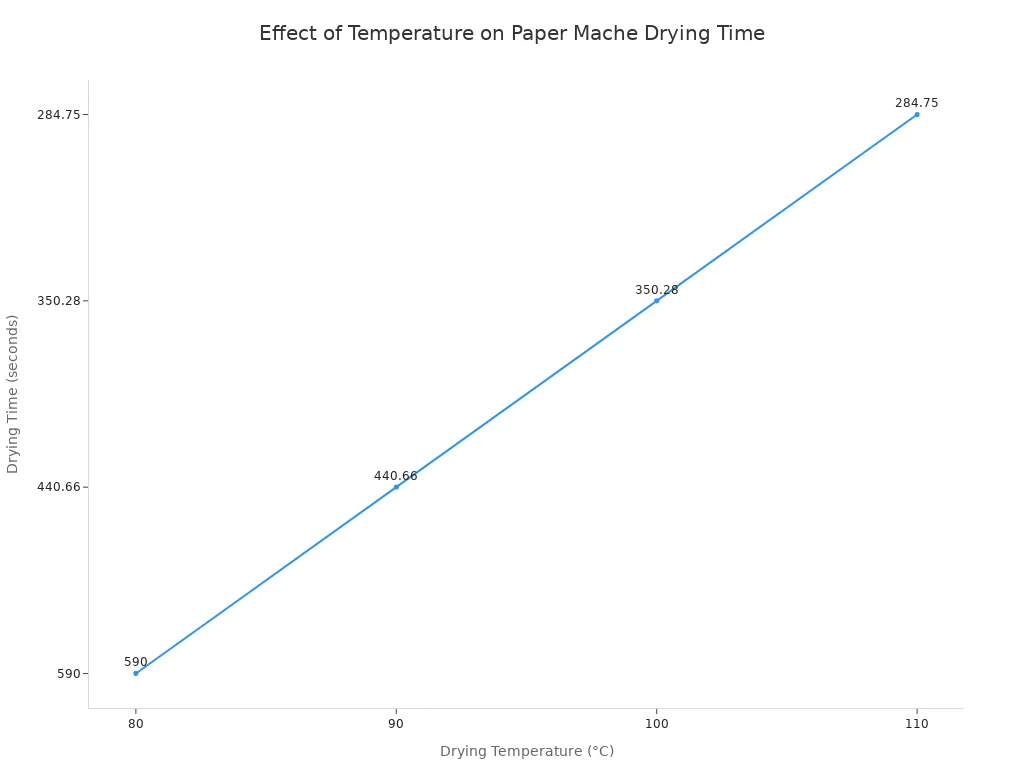
Temperature: A warmer environment helps paper mache dry faster. Look at how temperature affects drying time:
Drying Temperature (°C) | Drying Time (seconds) | Reduction in Drying Time (%) |
|---|---|---|
80 | 590 | - |
90 | 440.66 | 25.4 |
100 | 350.28 | 20.5 |
110 | 284.75 | 18.7 |
As you can see, increasing the temperature shortens the drying time. However, there is a limit. You should choose a good drying temperature. It helps your project dry without damage.
Layer Thickness: The more layers you add, the longer your project will take to dry. A paper mache piece with four layers, all applied at once, can take half a day to several days to dry. This also depends on how humid it is. Small piñatas might only need two layers. Larger piñatas often need at least three layers. More layers mean more drying time for each layer to become strong. So, how long does paper mache take to dry depends a lot on how many layers you use.
Quick-Dry Methods
Quick-Dry Methods Defined:
You want to speed up your paper mache projects. You can use quick-dry methods. These methods use different types of paste. You might use PVA glue, also known as white school glue. Wood glue also works well. Some stores sell pre-made quick-dry pastes. These pastes are not like the flour and water mix. They offer a faster way to create your art.
Quick-Dry Duration:
These quick-dry pastes significantly cut down drying time. Your project can dry in 2 to 12 hours. This depends on the specific paste you choose and your environment. For example, a mix of PVA (polyvinyl acetate) glue and water dries much faster than traditional flour paste. Many crafters find that paper mache made with a strong glue mixture can dry in 12 hours or less. You can often paint your project after it dries overnight. This makes your crafting process much quicker.
Some commercial products also offer fast drying. Consider these examples:
Aves Paper Mache: This product sets up in about 30-45 minutes. Its full cure time is 1-4 days. This depends on your project's size and thickness.
Activa Products' FastMâché: This product is known for its fast-drying properties. It offers a quicker cure compared to standard paper mache.
These products help you finish your projects sooner. You can even create super-strong paper mache that needs only one layer. This single layer can dry in 12 hours or less. This is a big difference when you consider how long does paper mache take to dry with traditional methods.
Quick-Dry Pros and Cons:
Quick-dry methods offer clear benefits. You save a lot of time. This means you can finish projects faster. The glues often make your finished piece stronger and more durable. You might also find these pastes easier to work with. They can give a smoother finish.
However, quick-dry methods also have some downsides. The specialized glues or pre-made pastes usually cost more than flour and water. The texture of the finished product might feel different. It might not have the same classic feel as traditional paper mache. You also need to consider the specific properties of each glue. Some glues might be less flexible when dry. Always read the instructions for any commercial product you use.
Speeding Up Drying
You want your paper mache project to dry faster. You can use several methods. These methods help you finish your art sooner.
Environmental Optimization:
You can change your drying environment. This helps your paper mache dry quickly. Reduce the humidity in the room. You can use a dehumidifier for this. Increase the temperature, but keep it safe. Improve air circulation. Use fans to move the air around your project. A fan blowing room-temperature air speeds up drying. You can hang wet paper mache pieces in front of an air vent. This works well if your air conditioner is running. Air conditioners also remove moisture from the air. Running a dehumidifier and a fan together can greatly reduce drying time. This can cut down the typical 48-72 hours.
Application Techniques:
How you apply your paper mache also affects drying time. Apply thinner, even layers. This helps each layer dry faster. Avoid using too much paste. Excess paste makes drying much slower. One user found that making paper mache ribs 3/16 to 1/4 inch thick dried slowly. They then applied layers more gradually. They suggest applying no more than 1/8 inch at a time. This helps with more efficient drying. Another expert advises applying two or three layers. Let these layers dry before you add more. This method ensures proper drying. It also helps you understand how long does paper mache take to dry for each section.
External Heat Sources:
You can use external heat sources. These can speed up drying. But you must be careful. Drying paper mache too quickly can warp your project. It can also cause cracking.
Fans: Use a fan on a low setting. Make sure it dries your project evenly. A stationary fan lets you dry your project hands-free.
Outdoor Drying: This works well in warm, windy weather. Remember to secure your project. You do not want it to blow away.
Hairdryers: These are best for smaller projects. Use a low setting. Keep the nozzle about 4 inches away from your project. This prevents damage. You can dry layer by layer or dry the whole piece.
Ovens: Using an oven has the biggest risk. There is a risk of fire. If you use an oven, preheat it to 199°F. Turn off the oven after 20 minutes. Then place your project inside for an hour. This method is good for smaller projects. You must watch it constantly.
Using heat, especially ovens, can cause problems. Your project might shrink or warp. It can lose sharp details. For example, a mask might shrink sideways. To prevent this, use fans for initial drying. Poke holes in thicker areas. This helps moisture escape. For casts, you can add a spacer. Use aluminum foil to help keep the shape. This prevents sideways shrinkage.
Is Your Paper Mache Dry?
You have worked hard on your paper mache project. Now you need to know if it is truly dry. This step is very important before you paint or finish your piece.
Visual Indicators:
You can tell if your paper mache is dry by looking at it. The entire surface should look dull and opaque. It should have a uniform color. Wet areas will often look darker. They might also show a slight shine. If you see any shiny or dark spots, your project still has moisture. Give it more time to dry.
Touch and Feel:
Next, you should touch your project. A completely dry sculpture will feel hard and rigid. It will not bend or feel soft. It should not feel cool or damp to your touch. Tap a thicker part of your sculpture with your knuckle. You should hear a crisp, hollow sound. This sound means it is dry inside. A dull or muted sound means there are still damp areas. A fully dry sculpture will also feel lighter. Water has evaporated, so it weighs less than when you first applied the last layer.
Why Complete Drying Matters:
You must ensure your paper mache is completely dry. Incomplete drying causes many problems. It greatly increases the risk of mold and mildew. This happens especially if air does not circulate well. If you cut semi-dry pieces and leave them apart, they will warp. They will warp in different ways. This makes putting them back together very hard. It also weakens the whole structure. Unsealed cut edges let moisture get inside the paper mache. This leads to warping and changes the shape. For example, a pumpkin mask's mouth might close, and the head might squish. This happens because it absorbs moisture. Knowing how long does paper mache take to dry fully prevents these issues. You ensure your creation lasts a long time.
Paper mache drying times change a lot. They can be a few hours. They can also be many days. This depends on your method. It also depends on your surroundings. Fast-dry ways are quick. Old ways give a classic look. Learn about these things. You can use smart drying tricks. You will become good at paper mache. Your projects will dry well. What cool thing will you make now?
FAQ
Can you put paper mache in the oven?
You can use an oven, but be very careful. Set it to a low temperature, around 199°F. Turn off the oven after 20 minutes. Then place your project inside for an hour. This method works best for small items. Watch your project closely to prevent damage.
How do you know if your paper mache is dry?
Your paper mache is dry when it feels hard and rigid. It should not feel cool or damp. Tap it; you will hear a crisp, hollow sound. The color will be uniform, with no dark or shiny wet spots. It will also feel lighter.
What happens if paper mache does not dry completely?
If your paper mache does not dry completely, mold and mildew can grow. The project will also be weak. It can warp or crack. This makes it hard to paint or finish. Always ensure it is fully dry for the best results.
Can you use a hairdryer on paper mache?
Yes, you can use a hairdryer. Use a low setting. Keep the nozzle about 4 inches away from your project. This helps prevent damage. Hairdryers work best for smaller areas or to speed up drying between layers.
Does humidity affect drying time?
Yes, humidity greatly affects drying time. High humidity makes your paper mache dry much slower. The air already holds a lot of moisture. It cannot take much more from your project. Use a dehumidifier or fan in humid conditions.