How to Easily Install Inch Round Tail Lights in 2025

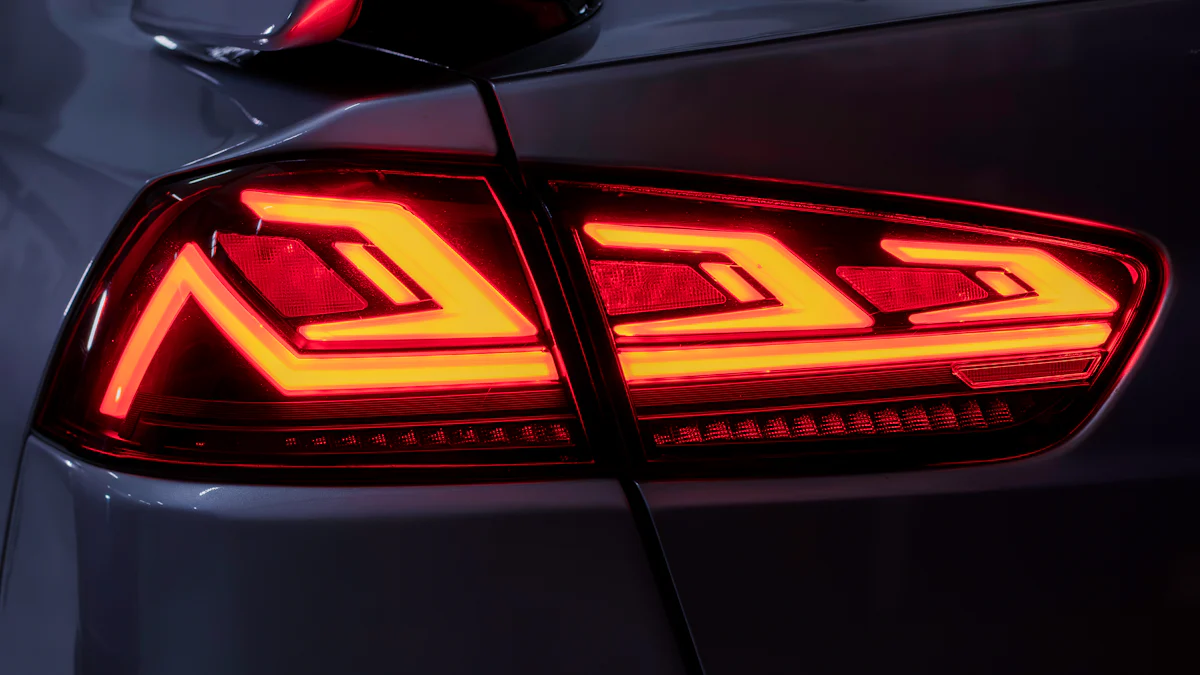
Are you ready to install inch round tail lights? Upgrading to Inch Round LED Tail lights can transform your vehicle. Not only do they last up to 25 times longer than traditional bulbs, but they also provide brighter visibility, especially in low light. This means you’ll enhance safety for yourself and others on the road. Proper installation is crucial, though. It ensures that your new lights function correctly and look great. Let’s dive into how you can make this upgrade easily and effectively!
Key Takeaways
Upgrading to inch round LED tail lights makes you safer. They last 25 times longer than regular bulbs.
Preparation is very important. Get tools like screwdrivers and safety glasses. Make sure your workspace is clean and bright before you start.
Follow a simple guide for installation. Carefully take out old lights. Put in new ones tightly, and check the wiring connections.
Test your installation well. Look at all light functions and alignment to make sure everything works and looks good.
Fix common problems like flickering or lights that don’t work. Check connections, look at fuses, and make sure the wiring is right.
Preparation for Installation
Before you dive into installing your new inch round tail lights, let’s get everything ready. Preparation is key to a smooth installation process. Here’s what you need to do:
Tools Needed for Installation
First, gather the right tools. Having everything on hand will save you time and frustration. Here’s a quick list of what you’ll typically need:
Screwdrivers
Ratchet, appropriate size sockets, and wrenches
Safety glasses
These tools will help you remove the old lights and install the new ones without a hitch.
Setting Up Your Workspace
Next, set up your workspace. Choose a well-lit area where you can comfortably work on your vehicle. If possible, park your car on a flat surface. This will make it easier to access the tail lights. Lay out your tools neatly so you can grab them quickly when needed. A clean workspace not only keeps you organized but also helps prevent losing small parts.
Safety Precautions to Follow
Safety should always come first. Before you start, make sure to wear safety glasses to protect your eyes from dust and debris. It’s also a good idea to disconnect the battery to avoid any electrical mishaps. If you’re working in a garage, ensure proper ventilation.
Remember, taking these precautions will help you avoid accidents and make the installation process smoother. With the right tools, a tidy workspace, and safety measures in place, you’re all set to tackle the installation of your new LED tail lights.
Step-by-Step Installation Guide
Now that you’re prepared, let’s get into the nitty-gritty of how to install LED tail lights. Follow these steps to ensure a smooth process.
Removing Old Tail Lights
First, you need to remove the old tail lights. Here’s how to do it:
Put on safety glasses to protect your eyes.
Disconnect the negative battery cable to avoid any electrical issues.
Access the tail light assembly through the trunk or by removing a panel.
Remove the fasteners using a screwdriver or socket wrench.
Disconnect the electrical connections by gently pulling the assembly away.
Unbolt the original tail lights and remove them slowly from the outside.
Make sure to keep track of all screws and fasteners, as you’ll need them for the new lights.
Installing LED Tail Lights
Once the old lights are out, it’s time to install your new inch round tail lights. Here’s what you should do:
Align the new LED tail lights with the mounting holes.
Insert the screws or bolts you saved from the old lights.
Tighten them securely, but be careful not to over-tighten, as this can damage the assembly.
Wiring the New Tail Lights
Now comes the crucial part: wiring the new tail lights. Here’s how to wire LED tail lights correctly:
Connect the wiring harness from the new lights to the vehicle’s wiring. Match the colors: typically, black is ground, and red is power.
Use wire connectors to secure the connections. Make sure they’re tight to prevent any loose connections.
Wrap the connections with electrical tape for added protection against moisture.
By following this step-by-step installation guide, you’ll have your new LED tail lights installed in no time. Just remember to double-check your work before moving on to the next steps!
Securing the Tail Lights
Now that you’ve wired your new LED tail lights, it’s time to secure them properly. This step is crucial to ensure that your lights stay in place and function correctly. Here’s how to do it:
Double-check the alignment of your tail lights. Make sure they sit flush against the vehicle’s body.
Insert the screws or bolts you removed earlier. Use your screwdriver or ratchet to tighten them securely.
Avoid over-tightening. This can crack the housing or damage the light assembly. Just make them snug enough to hold everything in place.
Tip: If your tail lights come with rubber gaskets, make sure they’re in place before securing the lights. These gaskets help create a seal that prevents moisture from entering the assembly.
Making Final Adjustments
After securing the tail lights, it’s time for some final adjustments. This step ensures everything looks good and works perfectly. Here’s what you should do:
Check the angle of the lights. Stand behind your vehicle and look at the tail lights. They should be level and aligned with the vehicle’s body.
Test the lights. Reconnect the negative battery cable and turn on your vehicle. Check the brake lights, turn signals, and running lights to ensure they all function properly.
Adjust if necessary. If any light appears dim or misaligned, you may need to adjust the screws slightly or check the wiring connections again.
Note: If you notice any flickering or dim lights during your test, don’t panic! We’ll cover troubleshooting common issues in the next section.
By securing your tail lights and making these final adjustments, you’re setting yourself up for success. You’ll enjoy the benefits of your new LED tail lights, knowing they’re installed correctly and ready to shine bright on the road!
Testing the Installation

Now that you’ve installed your new LED tail lights, it’s time to test everything. This step is crucial to ensure your lights work properly and look great. Let’s break it down into two main parts: checking functionality and ensuring proper alignment.
Checking Functionality of the Tail Lights
First, you want to make sure all your lights are functioning as they should. Here’s how to do it:
Reconnect the negative battery cable. This will power up your new lights.
Turn on your vehicle and activate the lights. Check each function:
Brake lights: Press the brake pedal and see if both lights illuminate.
Turn signals: Activate each turn signal and watch for blinking.
Running lights: Ensure they stay lit when the vehicle is on.
If you notice any issues, here are some common problems to look out for:
Burnt-out bulbs: This can lead to non-functioning tail lights, which is a safety risk.
Faulty wiring: This might cause intermittent or complete loss of function.
Corroded bulb socket: This affects the electrical connection, leading to flickering or total failure.
Blown fuse: Often overlooked, this can cause multiple tail lights to stop working at once.
Ensuring Proper Alignment of the Lights
After confirming that your lights work, check their alignment. Proper alignment ensures visibility and enhances the overall look of your vehicle. Here’s how to do it:
Stand behind your vehicle and observe the tail lights. They should sit level and flush against the body.
Adjust if necessary. If one light appears higher or lower than the other, you may need to loosen the screws slightly and reposition the light.
Tighten the screws once you achieve the desired alignment.
By following these steps, you’ll ensure that your new LED tail lights not only function correctly but also look great on your vehicle. Enjoy the enhanced visibility and safety that comes with your upgrade!
Troubleshooting Common Issues
Even with careful installation, you might run into some common issues with your new LED tail lights. Don’t worry! Here’s how to troubleshoot those pesky problems.
Dealing with Flickering Lights
Flickering lights can be annoying and may indicate underlying issues. Here are some typical causes:
Faulty light switches: Worn-out switches can cause flickering.
Grounding issues: Interruptions in the electrical flow lead to flickering.
Voltage regulator problems: Fluctuations in electrical current can cause lights to flicker.
Inconsistent power supply: A faulty fuse box can lead to flickering lights.
Loose or damaged connections: These can result in intermittent power supply.
Failing alternators: They can cause inconsistent power delivery.
Weak batteries: A dying battery may not provide a steady power supply.
Moisture in the housing: This can lead to electrical shorts or corrosion.
If you notice flickering, check these areas first. Fixing the issue often involves tightening connections or replacing faulty components.
Fixing Non-Functioning Lights
If your tail lights aren’t working at all, here are some common reasons:
Cracked housing: This can expose internal parts to moisture. Repair small cracks with adhesive or replace severely damaged housing.
Blown fuse: A blown fuse can stop multiple tail lights from working. Look for a burnt or melted appearance in the fuse and check the vehicle’s fuse diagram.
Burnt-out bulbs: This is a frequent cause of non-functioning lights. Symptoms include one or both rear indicators failing to light up.
Wiring issues: Check for burnt or frayed wires. Test voltage with a multimeter if you suspect wiring problems.
Corrosion: Clean the socket with a wire brush and apply a corrosion inhibitor. Replace the socket if corrosion is extensive.
By addressing these issues, you can get your LED tail lights back in working order.
Addressing Loose Connections
Loose connections can lead to intermittent lighting or complete failure. Here’s how to tackle this:
Inspect all connections: Make sure everything is securely connected.
Check for corrosion: Clean any corroded areas to ensure a good electrical connection.
Tighten screws and bolts: Ensure that all fasteners are snug but not over-tightened.
Taking these steps will help you maintain a reliable connection for your LED tail lights.
You’ve now learned how to install inch round tail lights step by step. From removing the old lights to wiring and securing the new LED tail lights, you’ve got the tools and knowledge to tackle this project confidently.
Upgrading to LED tail lights offers fantastic benefits. You’ll enjoy improved visibility, enhanced safety with quicker response times, and energy efficiency that saves you money in the long run. Plus, these lights can last up to 25 times longer than traditional options!
So, roll up your sleeves and give it a try. You’ll not only enhance your vehicle’s look but also boost its safety on the road!
FAQ
How long do LED tail lights last?
LED tail lights can last up to 25 times longer than traditional bulbs. You can expect them to shine brightly for around 15,000 to 50,000 hours, depending on usage and quality.
Can I install LED tail lights myself?
Absolutely! Installing LED tail lights is a DIY-friendly project. With the right tools and following the steps outlined in this guide, you can confidently upgrade your vehicle.
What if my new tail lights don’t work?
If your new tail lights don’t work, check the wiring connections and ensure they’re secure. Also, inspect the fuse and make sure the bulbs are properly seated in their sockets.
Do I need to modify my vehicle for LED tail lights?
Most vehicles don’t require modifications for LED tail lights. However, some older models may need a resistor to prevent hyper-flashing. Always check your vehicle’s specifications before installation.
Are LED tail lights brighter than traditional bulbs?
Yes! LED tail lights are significantly brighter than traditional incandescent bulbs. They provide better visibility, especially in low-light conditions, enhancing safety for you and other drivers on the road.